Tutorial 5 of 6
Sewing order, simulation and the production worksheet
Advanced 12 min
Control the sequence, start and end points, jumps and trims; watch the stitch-out simulator; and hand over a printed worksheet with DST or EXP.
A design that looks right can still sew badly: too many trims, a colour that comes back three times, or a jump across the whole patch. This tutorial covers the production side of Threadsmith.
How Threadsmith orders the stitching
With Automatic sewing order (design properties → Sewing order, or the Stitch menu):
- Objects are grouped by thread colour in the order the colours first appear in the object list — so put the background first and the details last.
- Inside each colour group, the next object is the one whose entry is nearest to where the needle is.
- Inside an object, fills are split into blocks and sewn nearest-first; open lines are sewn from the end nearest to the needle.
The small numbers in the object list show the resulting order.
Manual order sews exactly in list order. Reorder by dragging rows, with [ and ], or Alt+↑/↓ on a focused row. Stitch → Apply automatic order to the list gives you the automatic order as a starting point and switches to manual so you can fine-tune it.
Start and end points
Right-click on the canvas over a selected object → Set start point here / Set end point here. Green triangles and red squares mark them. Use them to make an object start next to the previous one, or to end a fill where the next satin border begins. Clear them in Properties → Start & end.
Connections: sewn, jumped or trimmed
The machine settings (design properties → Machine) decide what happens between two pieces of stitching:
| Gap | Result |
|---|---|
| shorter than Sew gaps under (default 1.2 mm) | a normal stitch |
| up to Trim gaps over (default 5 mm) | a jump (the needle moves without sewing) |
| longer | tie-off, trim, jump, tie-in |
| colour change | tie-off, trim, colour stop, jump, tie-in |
Tie-in and tie-off are tiny back-and-forth lock stitches (0.7 mm) that keep the thread from pulling out after a trim. In DST files, trims are written as three zero-sum jumps — the convention machines use to trigger their trimmer.
Watch it sew
Press 4 for the stitch-out simulator.
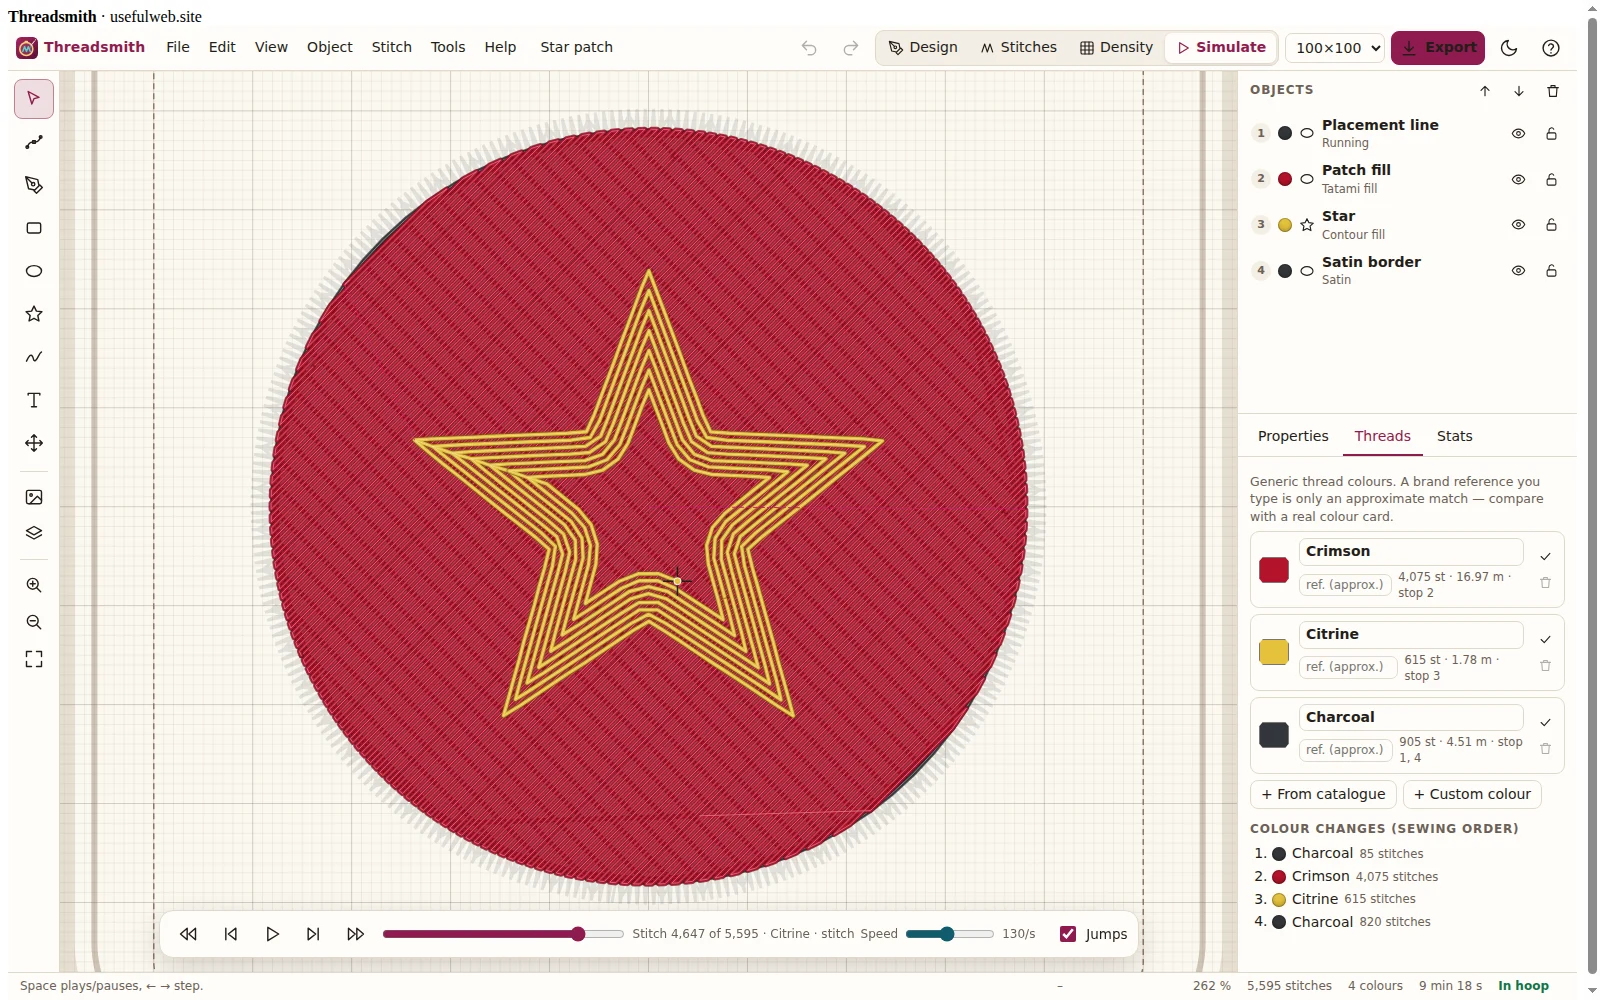
- Space plays and pauses, ←/→ step one stitch (with Shift: 10), Home/End jump to start/end.
- The slider scrubs through the whole design; the speed slider goes from a few to thousands of stitches per second.
- With Jumps on, jumps are drawn as dashed lines so you can spot long travels.
- The info line shows the stitch number, the current thread and the command (stitch, jump, trim, colour change).
Threads and colour stops
The Threads tab lists every thread with its stitch count, estimated thread length and the stop numbers where it is used. If a colour appears at several stops, consider reordering. You can rename threads and type a reference from your thread brand — Threadsmith always prints it as “≈ approximate”, because screen colours never match a real colour card exactly.
Statistics and estimates
The Stats tab shows stitches, colour changes, trims, jumps, size, hoop fit, maximum density and a design check. Estimates: top thread = sewn length + 0.8 mm per stitch + 5 %; bobbin ≈ one third of the sewn length; sewing time = stitches ÷ machine speed + 4 s per trim + 20 s per colour change (all adjustable under Machine).
Hand over to production
File → Production worksheet (Ctrl+P) opens a printable A4 sheet:
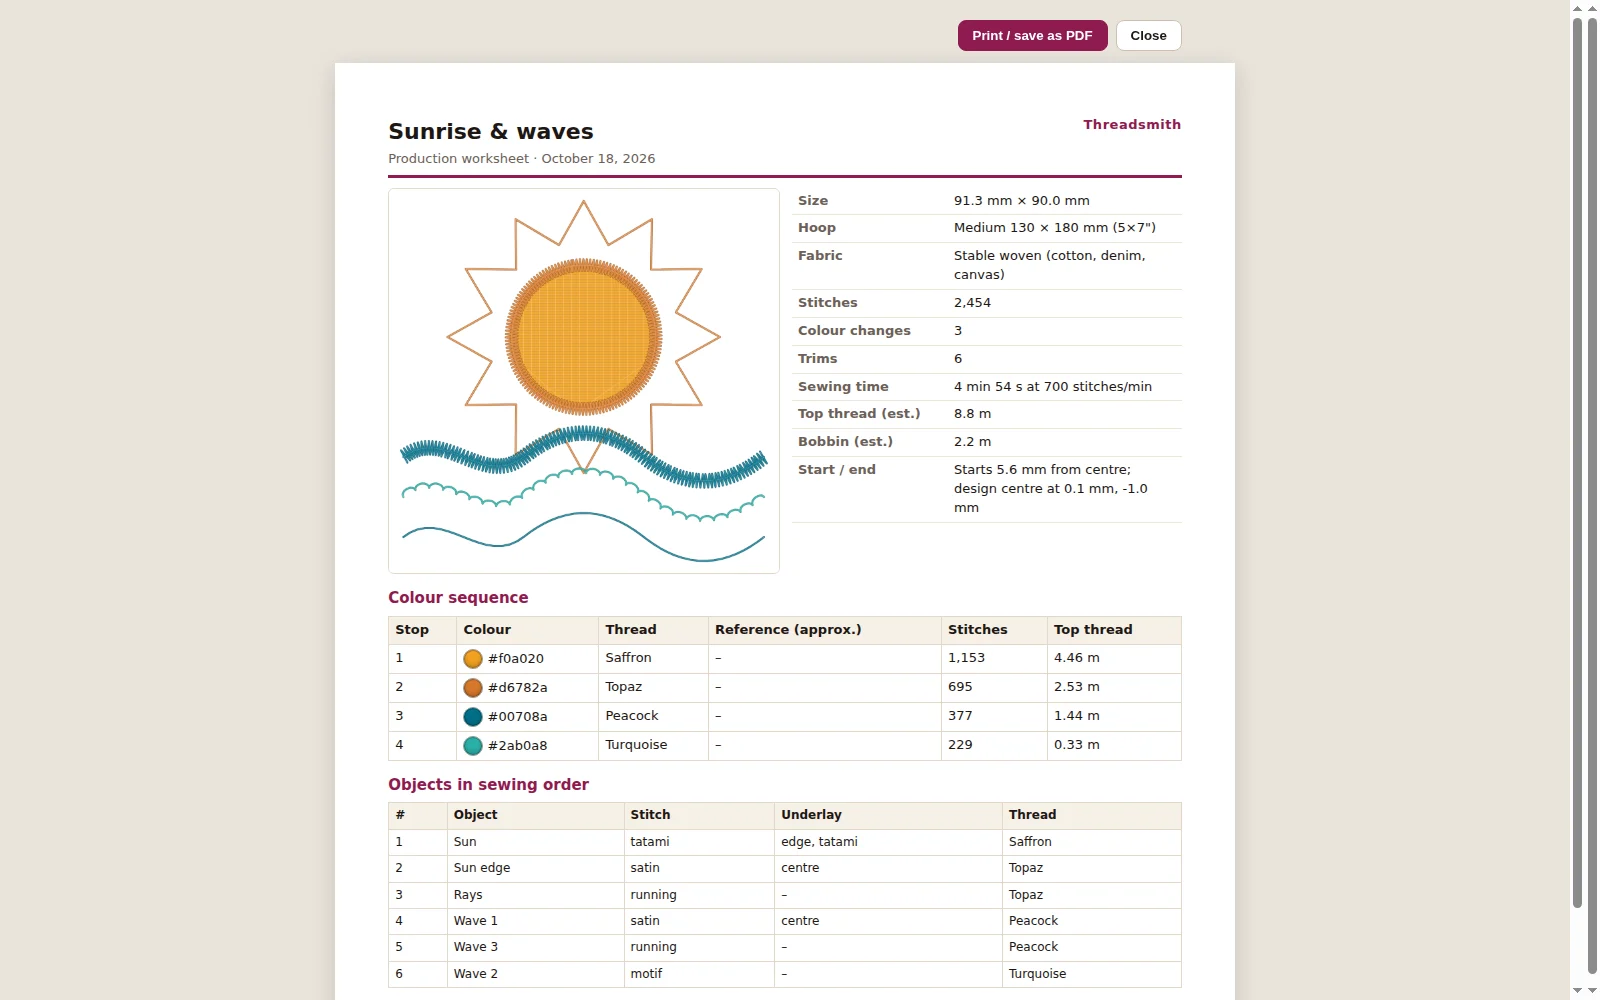
It contains the preview, size and hoop, fabric, stitch count, trims, time, thread and bobbin estimates, the colour sequence with swatches and every object in sewing order with its stitch type and underlay, plus your notes (design properties → Notes for the worksheet). Print it or save it as PDF from the print dialog.
Then export File → Export Tajima DST or Export Melco EXP. Both files are written in 0.1 mm machine units; moves longer than the format allows (12.1 mm for DST, 12.7 mm for EXP) are split automatically.
Re-open machine files
File → Import DST / EXP… reads stitch files back — your own or ones from elsewhere. Each colour block becomes a stitches object you can recolour, move, scale, re-sequence or edit point by point with the node tool. Use this to check a file before it goes to the machine, or to combine an existing design with new lettering.