Tutorial 3 of 6
Lettering and name tags with the built-in font
Beginner 8 min
Add text, choose single-line or outline lettering, sew it as running, bean or satin and fine-tune size, spacing and slant.
Threadsmith includes its own embroidery font designed for stitching: every letter A–Z, a–z, the digits 0–9 and common punctuation (. , ! ? - _ ' " : ; ( ) / & + # * =). It comes in two styles:
- Single-line — each letter is a set of centre lines. Sew them as a running/bean stitch (small text, from about 4 mm) or as satin columns (bold text from about 8 mm).
- Outline — the strokes are thickened into real letter shapes (with holes in O, A, B …) that you can fill with tatami or satin, or outline with a running stitch.
Add text
- Press T and click in the hoop where the middle of the text’s baseline should be.
- The text field in Properties is focused — type your text. Use a new line for a second row.
- Set Letter height (the height of capital letters in mm). 6–8 mm is the smallest size that stays readable in satin; single-line running text works from about 4 mm.
Double-click any text on the canvas to edit it again.
Choose how it sews
Under Stitches:
- Running with Bean (triple) stitch gives a hand-written look for small lettering.
- Satin sews a column along every stroke. Set Column width to roughly 14 % of the letter height (for 16 mm letters about 2.2 mm). Keep Short stitches on curves on — the inside of
o,eandsstays clean. - For Outline font style choose Tatami fill or Satin for filled letters, or Running to sew only the letter outlines. Outline weight sets the thickness of the letter strokes.
Spacing, alignment and slant
- Letter spacing adds (or with negative values removes) space between letters, in mm.
- Alignment left / centre / right is relative to the point you clicked (X / Baseline Y).
- Slant gives a faux italic (−30° to 30°), Rotation turns the whole text.
Make a name tag
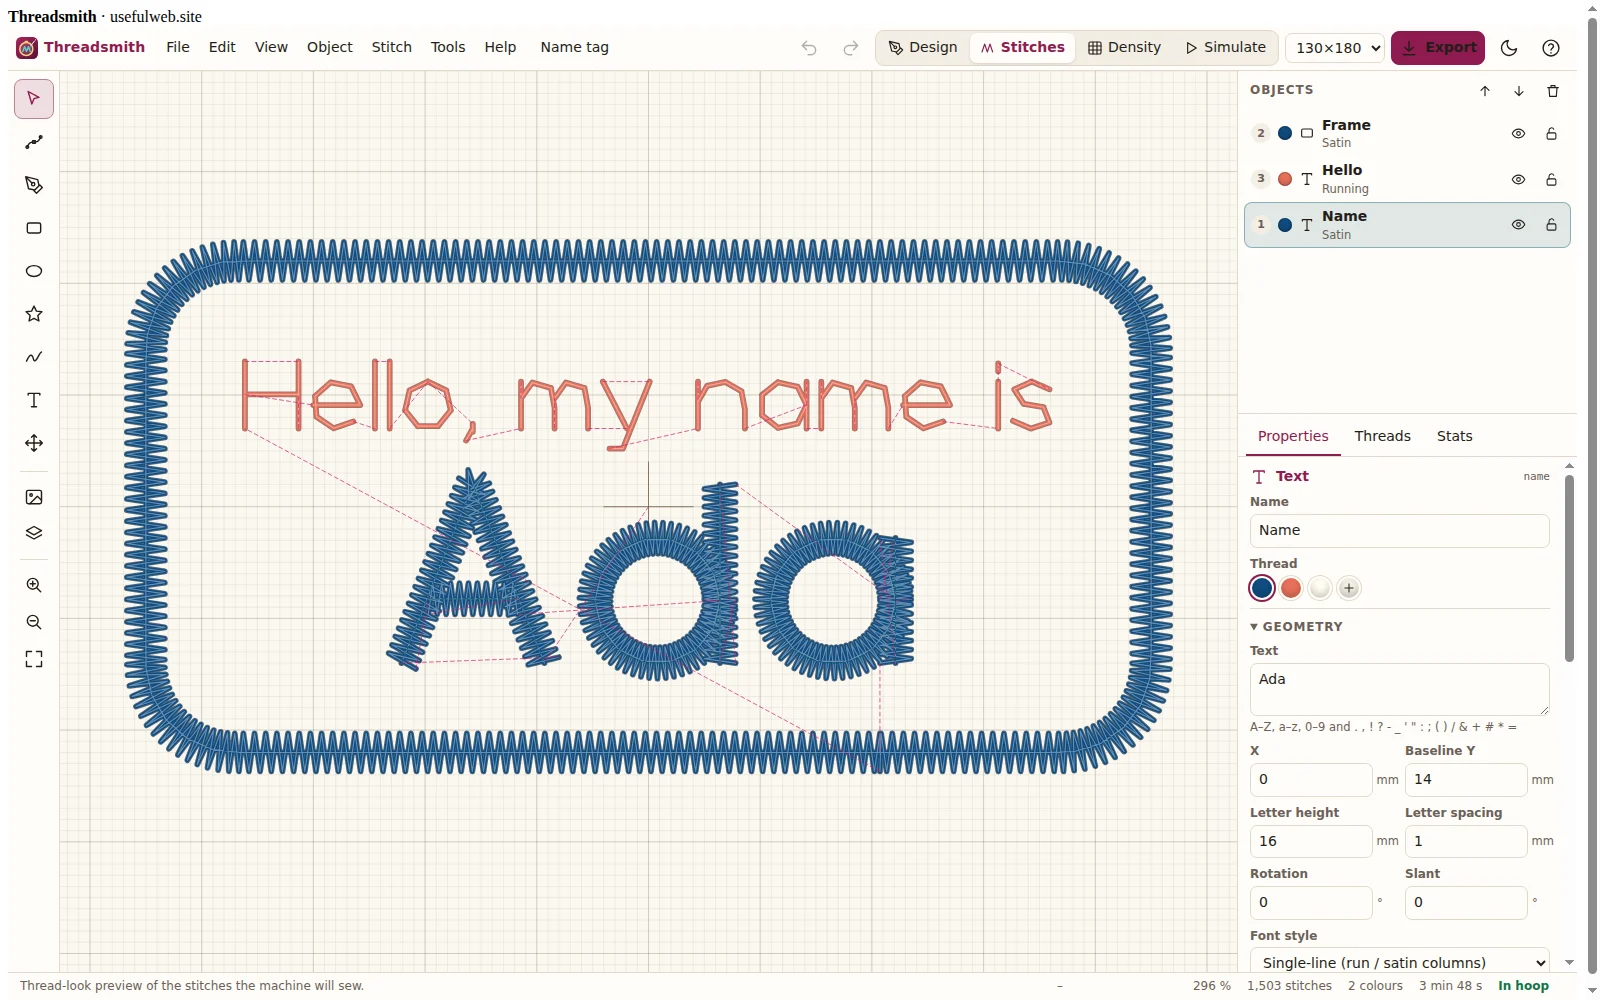
- File → New… → template Name tag, or build it yourself:
- Draw a rounded rectangle (R), set Corner radius to 8 mm and stitch type Satin, mode Border along the outline, width 3 mm.
- Add the name with T, letter height 16 mm, satin width 2.4 mm, centred.
- Add a small line of running text above it (6 mm, bean stitch).
- Press 2 to see the stitches and 4 to watch the simulator sew it letter by letter.
Tips for crisp lettering
- Sew lettering after the background it sits on — with automatic sequencing that happens when its colour comes later in the object list.
- Use a centre-walk underlay under satin letters (set automatically).
- Lettering creates jumps between letters; the dashed red lines in the stitch view show them. Gaps longer than the Trim gaps over distance (design properties → Machine) are trimmed with tie-off and tie-in stitches.
- Characters the font does not contain are replaced by
?and listed as a warning on the object.